Fancy Face Founder Brittany Gray gives a tutorial on how she styles her hair and exactly how to create those perfect beachy waves!
I wanted to share with you a little Fancy Face hair how-to. I love to style my hair with those soft, loose, beachy waves and I’ve been asked a few times on social media to give a little tutorial about how to get the beachy waves I love to rock daily. So here are some of my favourite hair products and tools that I adore, and exactly how to get that beachy wave look and style!
SHAMPOO + CONDITIONER
To begin with, you want to be sure you’re using the best shampoo and conditioner for your hair. There are a number of wonderful brands out there, but some work better for curls, some for thin hair, some for thick. Find the combination that will help keep your hair healthy and full of strength and shine. Some of the brands I really love are Davines and L’Oreal Pro, both are great. I personally use shampoo for thinner and fine hair, but whatever your needs, use the best quality and professional grade products.
PROTECTION
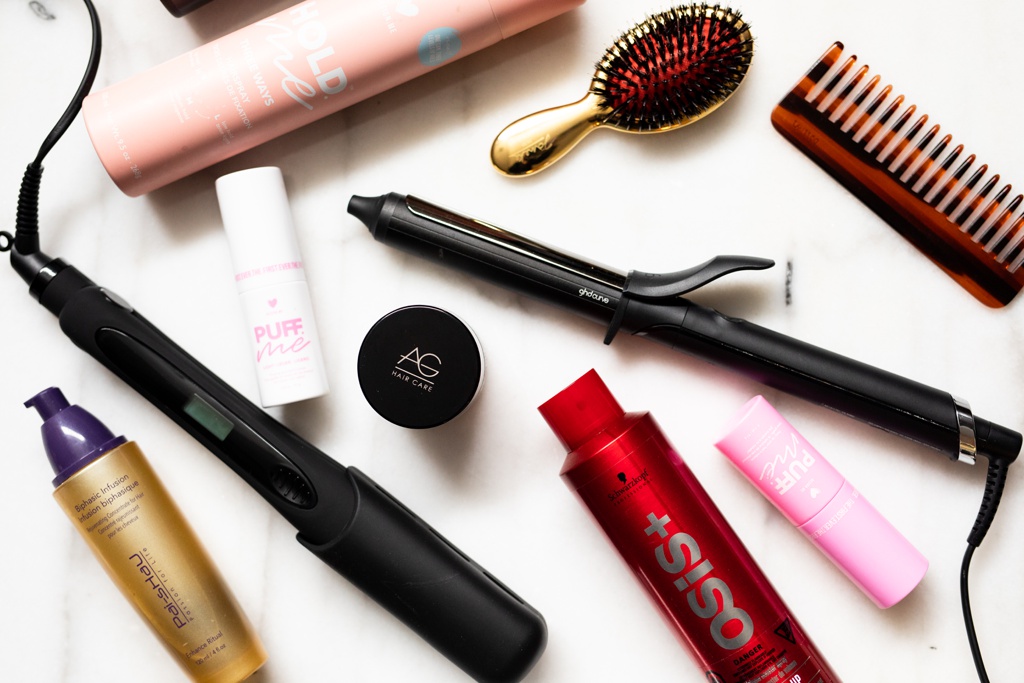
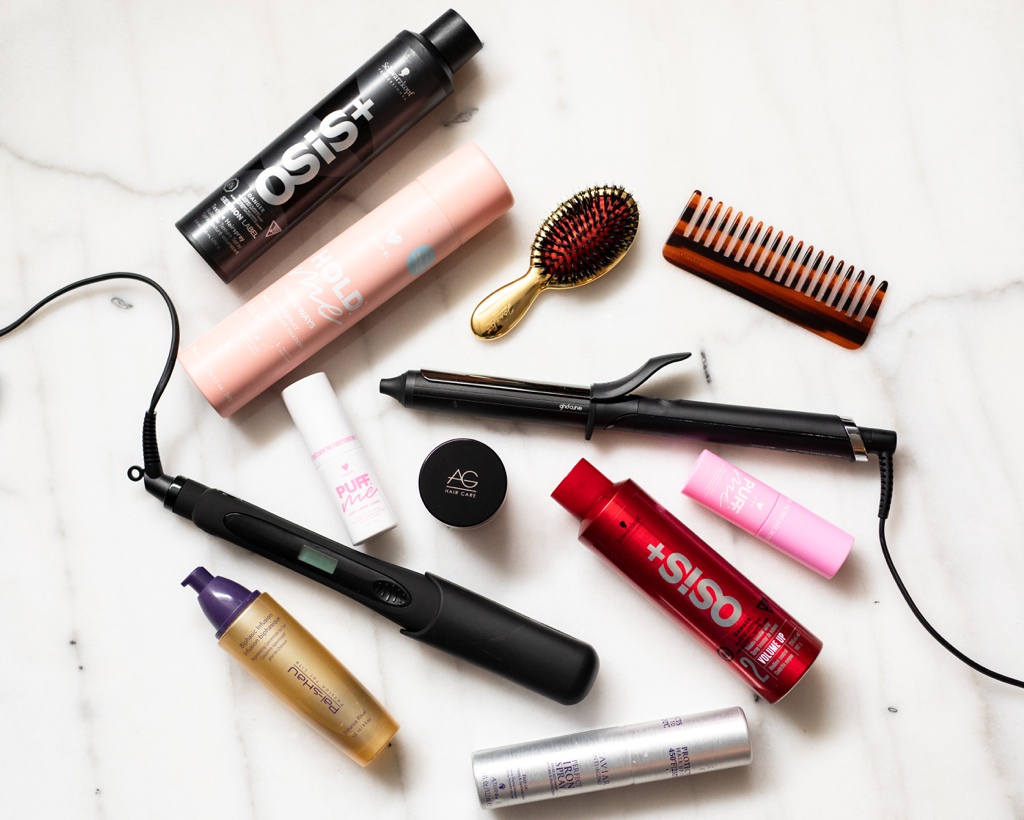
When I get out of the shower, I use a concentrate first to hydrate and protect my hair. Pai Shau’s Biphasic Infusion is my go-to. It smells incredible, it’s easy to activate, just give it a shake and apply, and it helps keep your locks healthier, especially with thinner hair. From there, I use an amazing T3 Hair Dryer (I love my white and gold colour!), to dry my hair. Once it’s dry, I spray the Alterna Caviar Anti-Aging Spray on my hair from root to tip and brush it through my hair. It protects your hair up to 450 degrees fahrenheit; I’m very cautious when it comes to protecting my hair so I know that this product works.

STRAIGHTENER
Once my hair is dry after I’ve applied the heat protection spray, I use a straightener, my go-to is the new Schwarzkopf Straightener. Not only does it work brilliantly, it also comes with a heat shield so it’s easy to pack up quickly when you’re travelling and on the go. However, I only straighten my roots and the tips of my hair. I part my hair first and gently get the kinks out of my roots and ends. I don’t sweat the under layer too much as I don’t want my hair to fall flat, so I focus on the top layer specifically, leaving the middle bulk of my hair to be curled and waved.
HAIRSPRAY + TOOLS
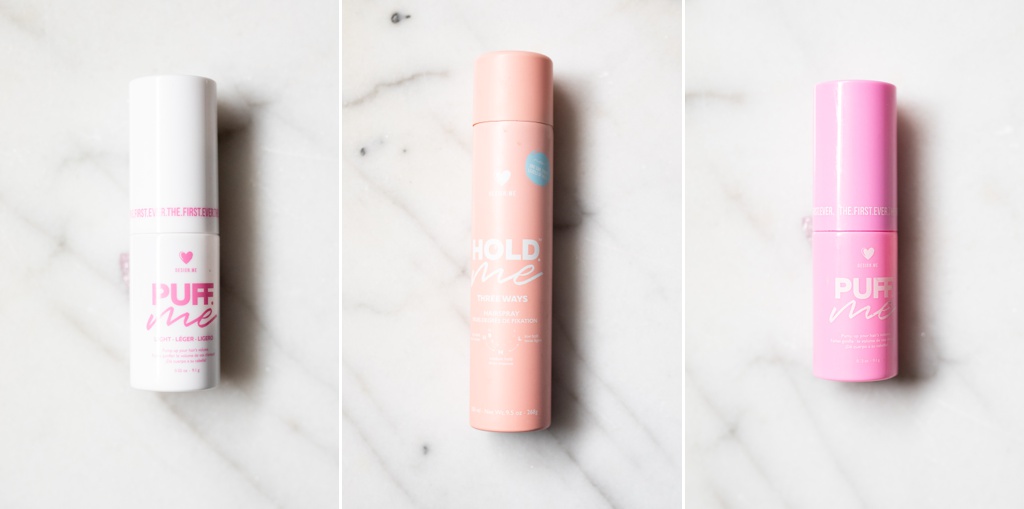
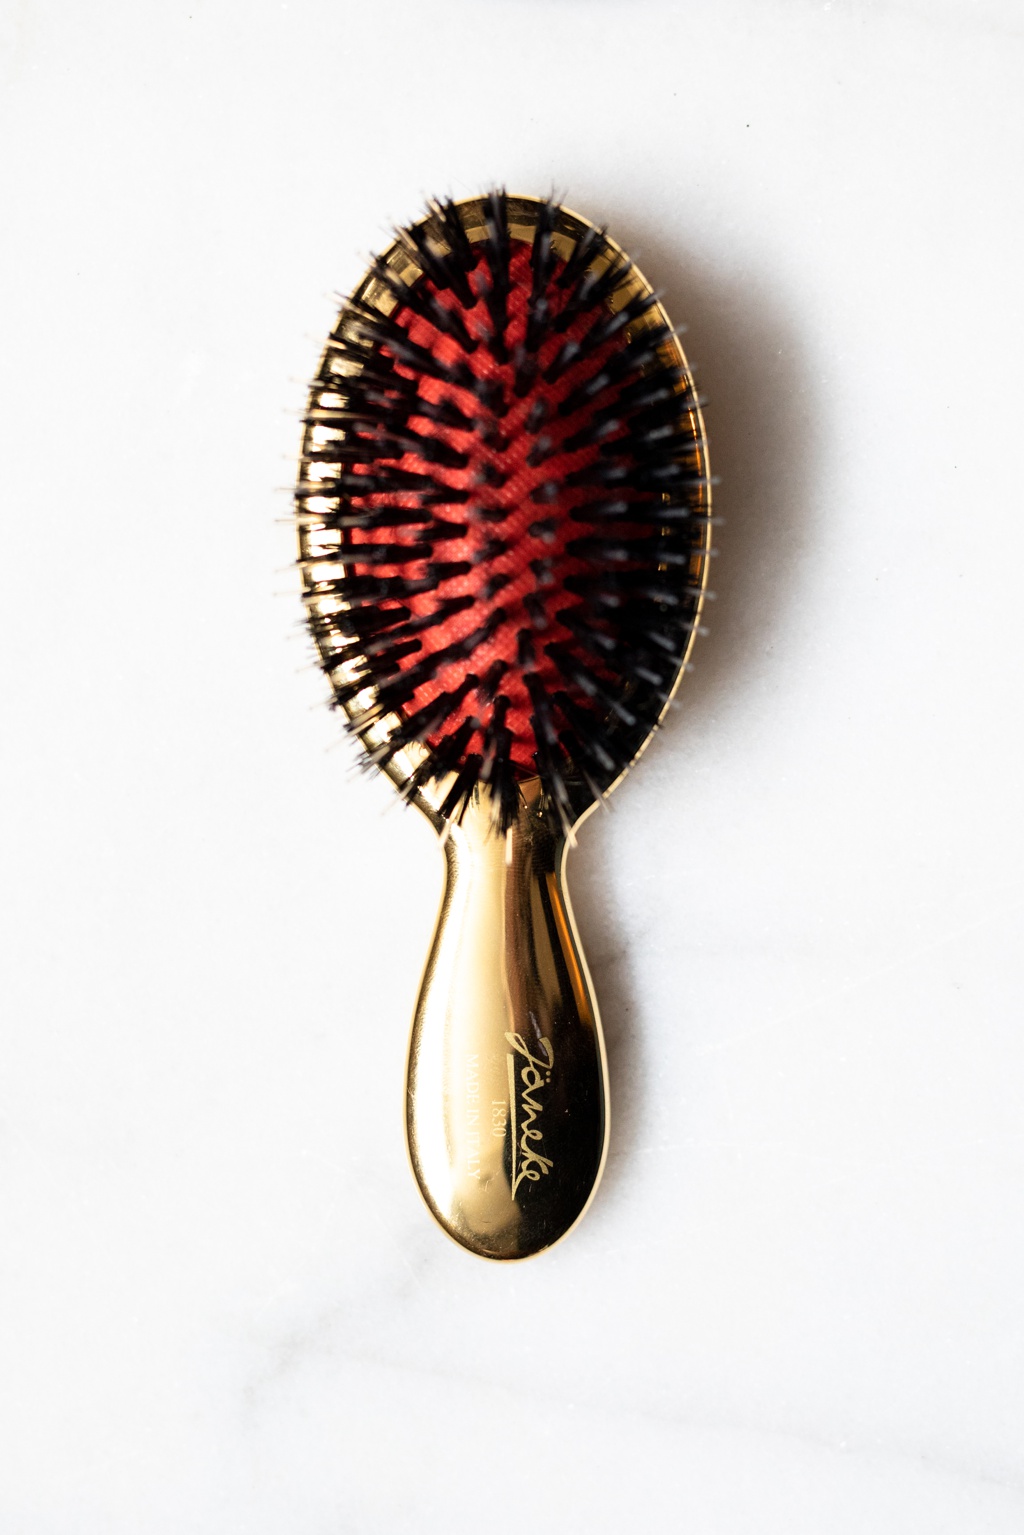
Next up, I give my hair a little spritz with hairspray before I begin to style. I don’t go in piece by piece as I curl, I just use a Hold Me Design Me Spray. The reason I love this spray is because it gives you a hold level option, light, medium and high hold. I usually use the light setting on the nozzle and give a gentle but full spritz to give me the perfect assist! It really does help keep your curls in place and make your style last. I use it on brides often! Ok. Back to the styling. I spray and then brush my hair through with my trusty Janeke boar bristle brush. It’s adorable and these bristles really help to bring the oils from the scalp all the way through the hair, leaving it looking very healthy. I’d highly recommend this brush or a similar Mason Pearson. Quite honestly, any boar bristle brush will do you wonders!
GET THOSE BEACHY WAVES
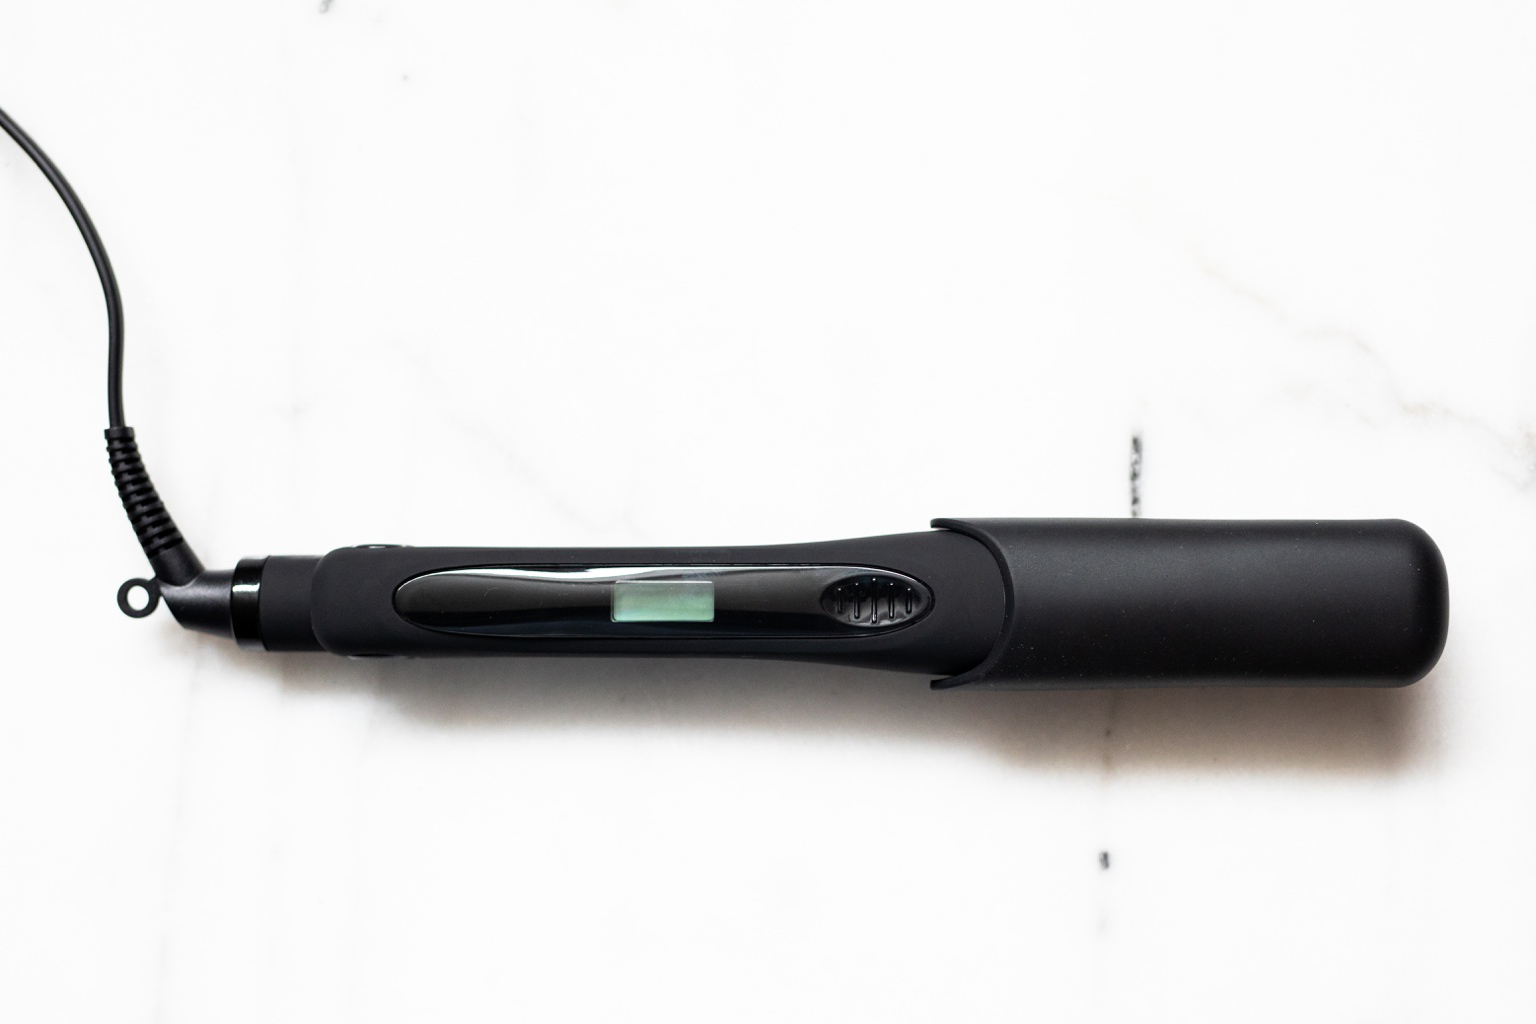
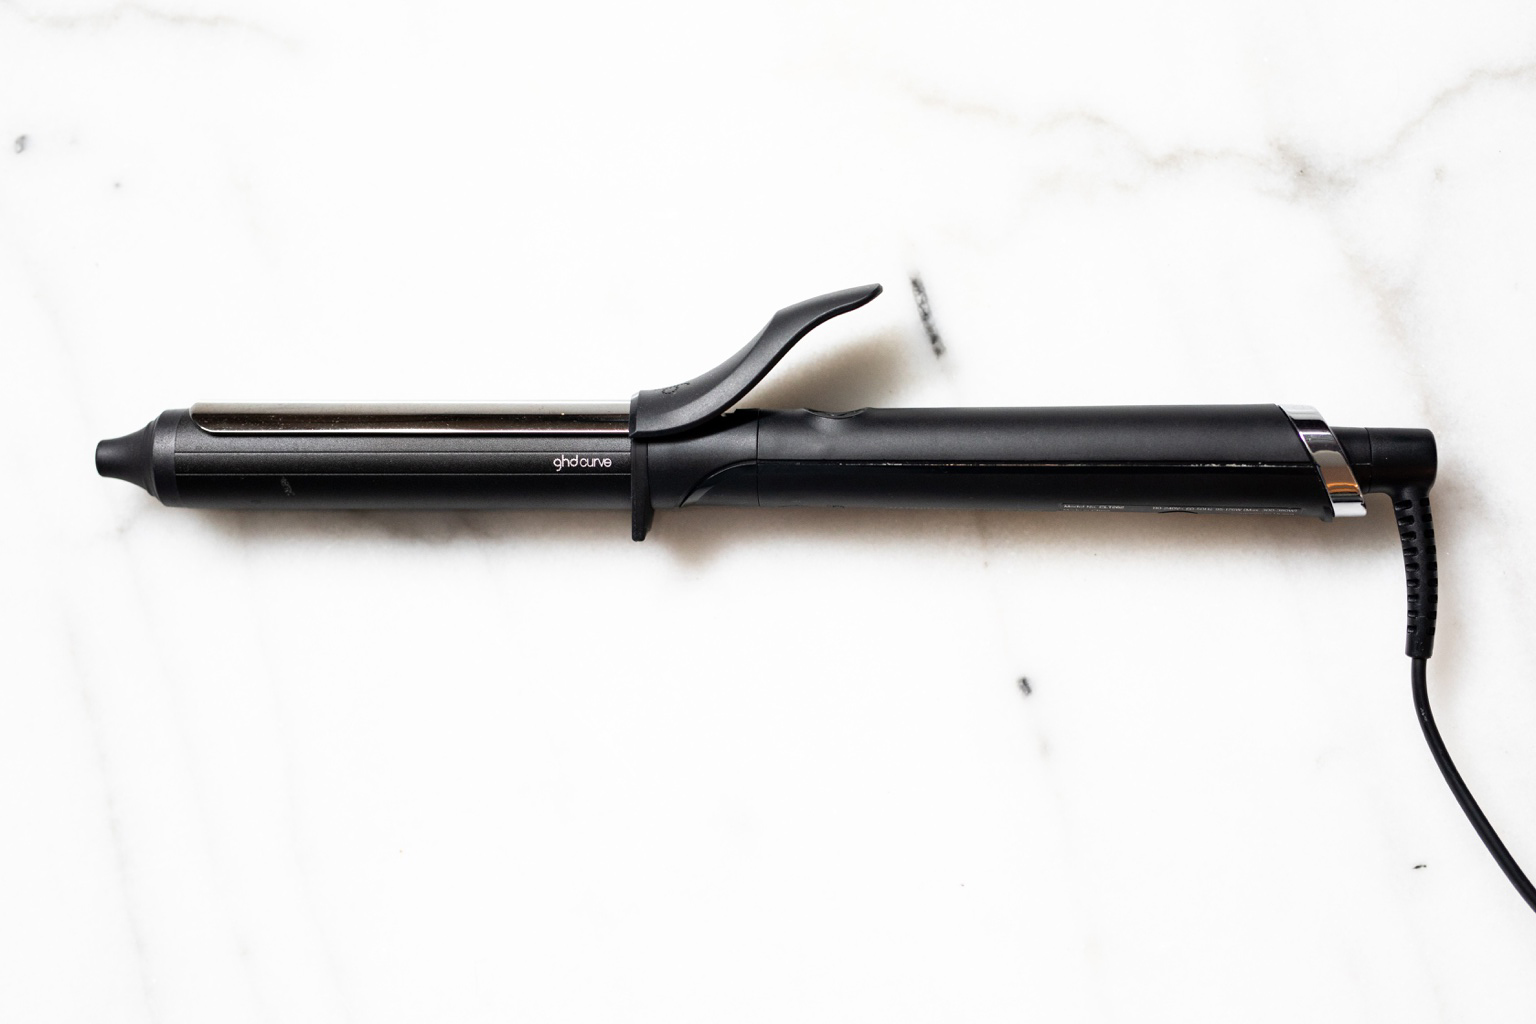
Let’s get styling! When I get started, I don’t focus on separating my hair and going from the nap of my neck outwards. As I mentioned earlier, I part my hair down the middle and bring the two sides forward, then really focus first on the top layer of my hair. Start from the front by grabbing a piece of hair and grab your curling iron! I go for the Good Hair Day (GHD) Curve one inch curling iron, it’s very gentle on your hair and doesn’t pull or tug, it’s amazing for those with fine hair or anyone who really wants to protect and prevent breakage. I really have never used an iron as great as this one and though it is a bit pricey, if you’re in the market for a long term, quality curling iron, this is the one. So grab your iron and that piece of hair, and as you make a curl, curl away from the direction of your face. Loop that curl through, repeat again with another curl in the same piece of hair and then gently straighten the end. Definitely check out my video to be able to watch and see as well, I find having the visual always helps! This curl and repeat should give you a nice, loose curl with a straightened end for a bit of that edgier look that I love as opposed to a soft curled end. Then go ahead and repeat through the hair, not worrying too much about the under layers. For people with finer hair, once you’ve gotten the hang of it this becomes a very quick and easy style and it’s a terrific little glam hack when you can really master it. It’s an equally fabulous look for thicker hair, it just takes a little bit more time to style.
As you curl, you’ll notice some of the hair underneath is still straight. That’s ok! We’ll get it all brushed and glammed up soon and it will be fabulous! Repeat all the way around your lovely head. The smaller the sections of hair you take the beachier looking the curl. One part of the hair where I do focus a little bit on the under layer is in the front. I must admit I’m not overly concerned with the back, but if you ensure you’ve parted your hair and brought both sides forward, it’s easy to curl the back for a fuller curl all the way around.
After I’ve curled my hair, I take a moment to run my fingers through from root to tip, pulling the hair out and allowing the curls and hair to loosen and pull apart for a casual, edgier look. If you have the time and like your hair to be a bit smoother and put together, you can use a fine tooth comb as opposed to your fingers to brush through your curls.
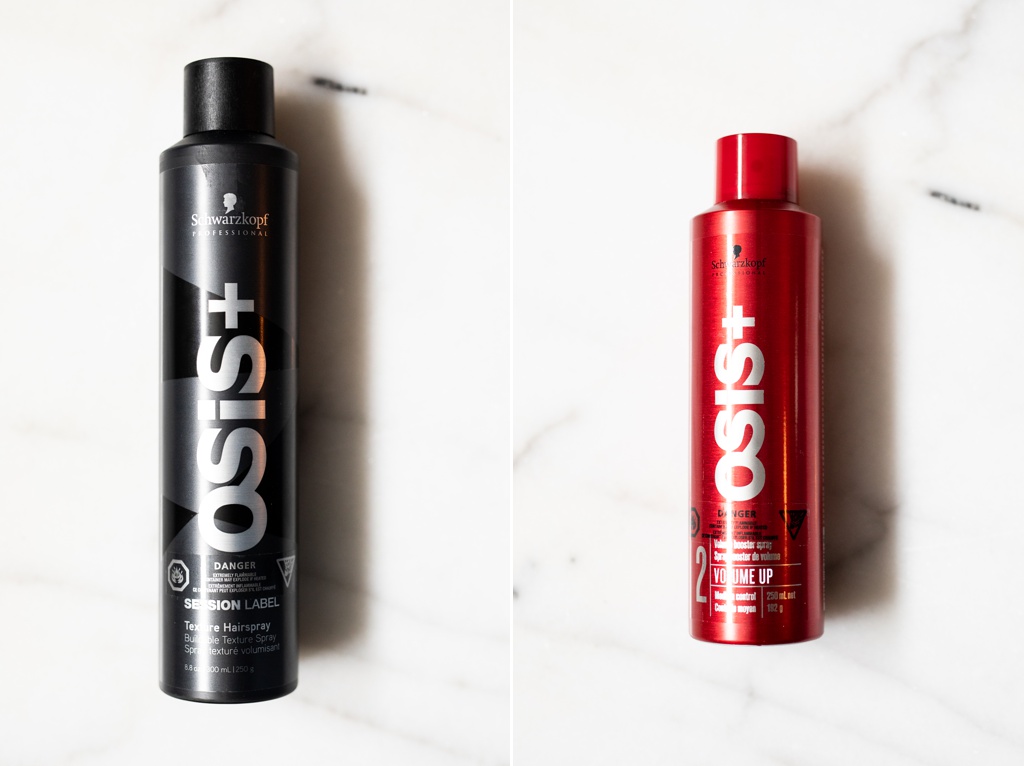
From there, I give my hair a spray with a textured hairspray to make sure the curls hold. I use the Schwarzkopf Session Label Texture Hairspray, they are amazing and the Osis+ line is brilliant. Don’t forget to do a little head-flip to get the hair underneath to add volume! If you really want to go for it, use a product like the Volume Up hairspray from Schwarzkopf, which is a bit of a mousse spray and has a waxy texture to really help give you that piece-y look on the ends, a look I’m a huge fan of. Go ahead and do another little hair flip and spray while you’re at it!
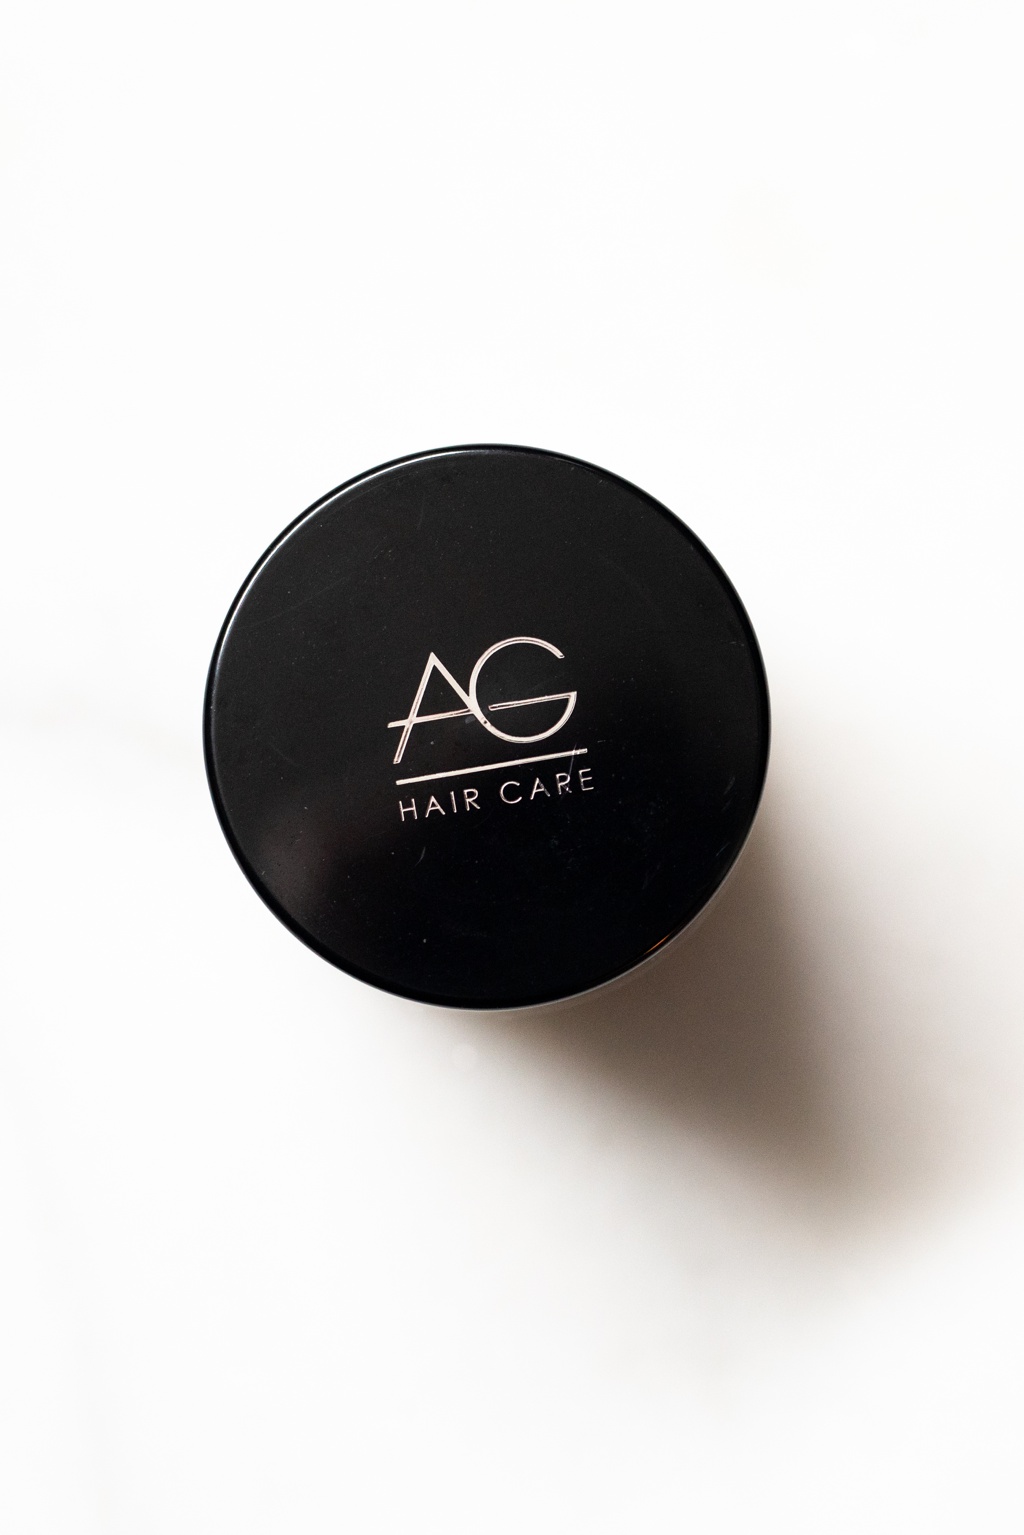
For extra lift and volume in my roots I use Dry Lift by AG, an all natural pomade type product. It has a bit of a gritty texture but doesn’t weigh down your hair or make it greasy. Just rub it through your fingers and work it through your roots. You can use it at the ends if you’d like, as well.
Wrapping it up, you can give another little spray or give the tips a straightener touch up, but by now, you’ve created that beachy look that I wear nearly every day! It’s so versatile in terms of wear, playing with different parts in my hair or glam and edgy clips can give the look a different flair. You can wear it during the day and glam it up at night. Make it your own and enjoy the style!
As always, if you have any questions or comments, don’t hesitate to give me a shout! Til next time…x
Davines // @davinesofficial
L’Oreal Pro // @lorealpro
Pai Shau’s Biphasic Infusion // @paishau
T3 Hair Dryer // @t3micro
Alterna Caviar Anti-Aging Spray // @alternahaircare
Schwarzkopf Straightener // @schwarzkopfpro
Hold Me Design Me Spray // @designmehair
Janeke // @janeke.it
Mason Pearson // @masonpearsonbros
Good Hair Day (GHD) Curve // @ghdhair
Schwarzkopf Session Label Texture Hairspray // @schwarzkopfpro
Volume Up // @schwarzkopfpro
Dry Lift by AG // @aghair