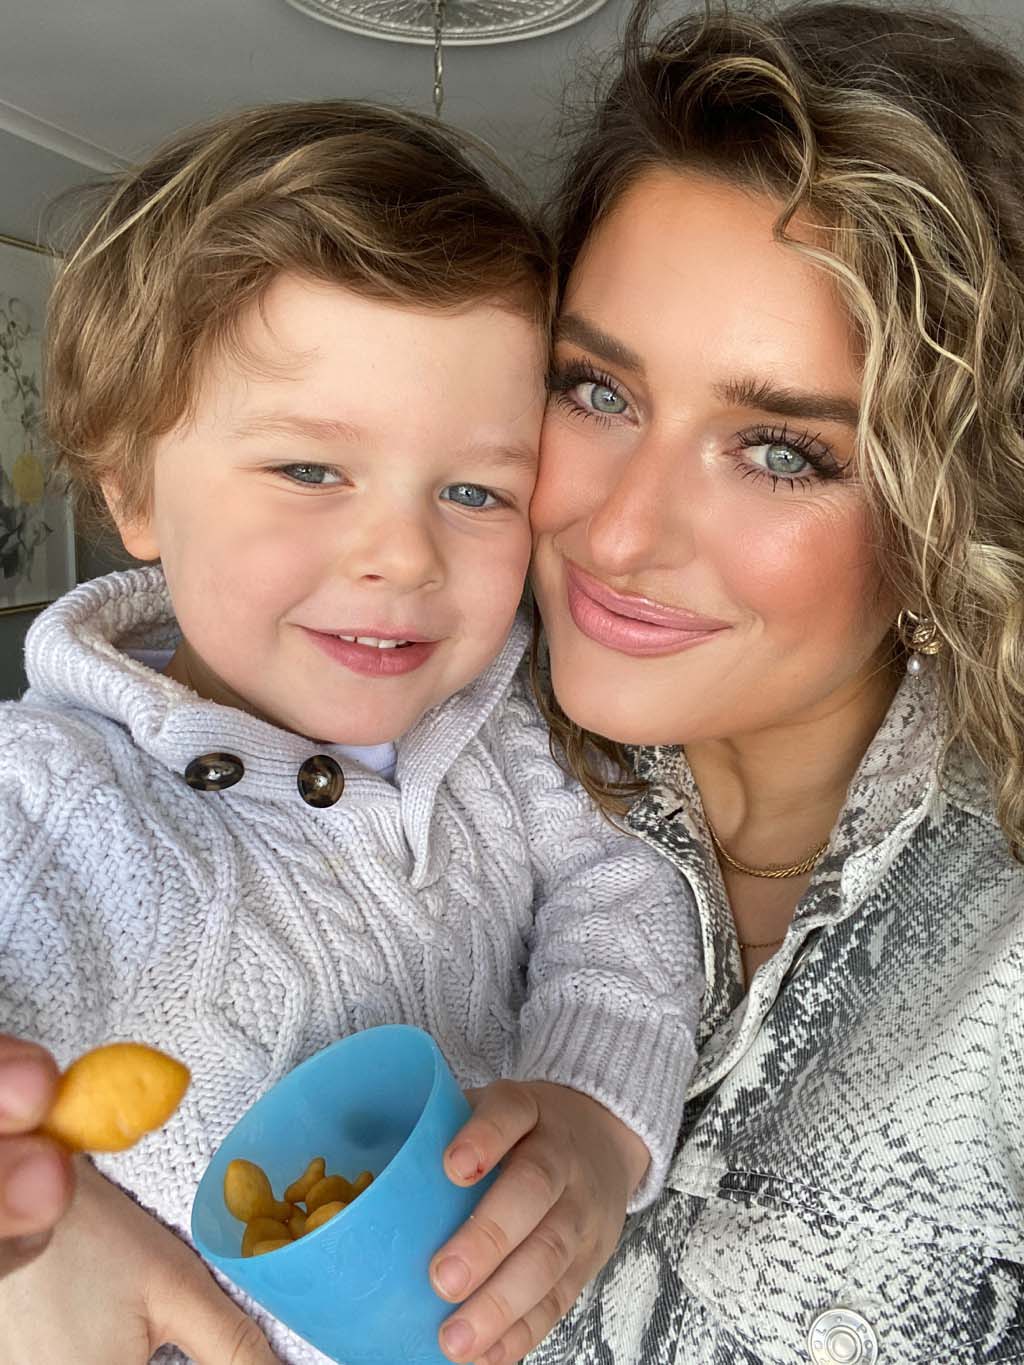
It’s time to embrace your natural curls, beauties! If you follow us on social media, some of you may have recently seen an Instagram post of me wearing my natural curls in their full glory. Being a frequent straight-hair wearer, many people didn’t know that I was born with pretty curly hair, thanks to my Maltese roots on my mother’s side. Now for someone with thin hair, learning how to style my natural curls properly was a bit of a struggle for me, so I often opted to blow dry and straighten my locks.
However, now after 35 years, I’ve learned a thing or two about how to really train your curls and how to achieve voluminous, natural, bouncy curls that don’t look crispy from gel or overly wet.
Here is the hair care routine I use when I want my natural curls to be the star of the show for the day. This blog is definitely for those that have naturally kinky, wavy, or curly hair!
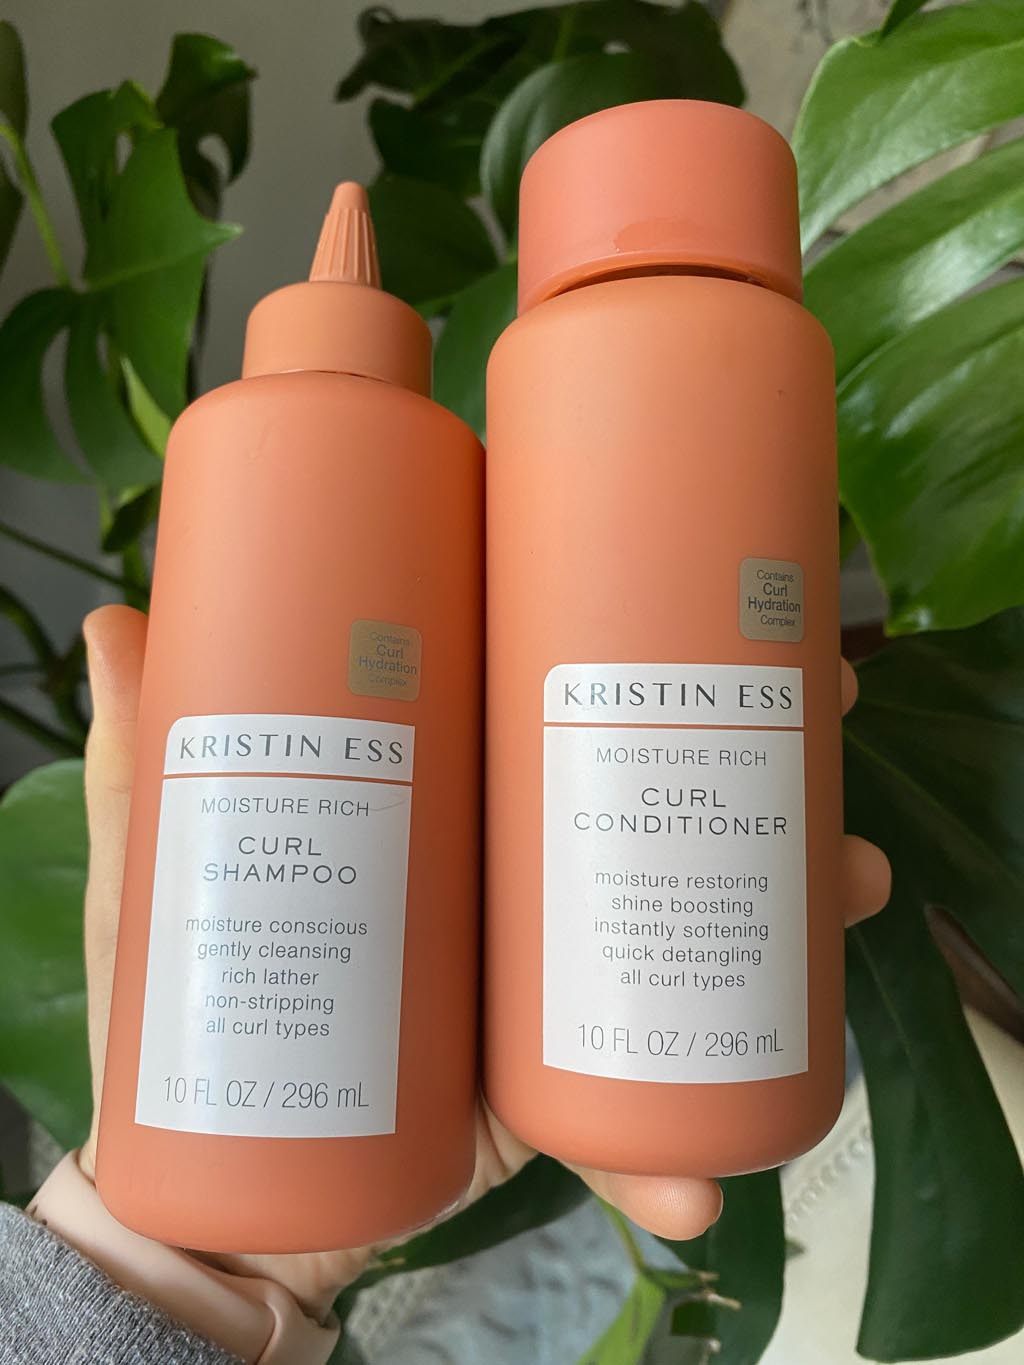
Step 1: Opt for a shampoo and conditioning routine that really allows your hair to soak in some moisture. Natural curls love to be hydrated and moisturized. Lately, I’ve been loving the Kristin Ess Shampoo and Conditioning curl line that I purchased from well.ca! A collection fully focused on slip, moisture, and definition. The shampoo formula gently cleanses without stripping, has a good slip, and creates a super-rich lather to make wash day a pleasure. This is also my favorite conditioner for anyone with curly hair who only washes once or twice a week. It’s incredibly moisturizing but won’t weigh your curls down. If you’re looking for something heavier, try the Ultra Hydrating Curl Repair Mask! *Always use a wide-tooth comb and comb out your hair while your conditioner or mask is nourishing your hair. I always do this to ensure every strand is coated with all the goodness! Here’s one Hair Detangling Comb I love!
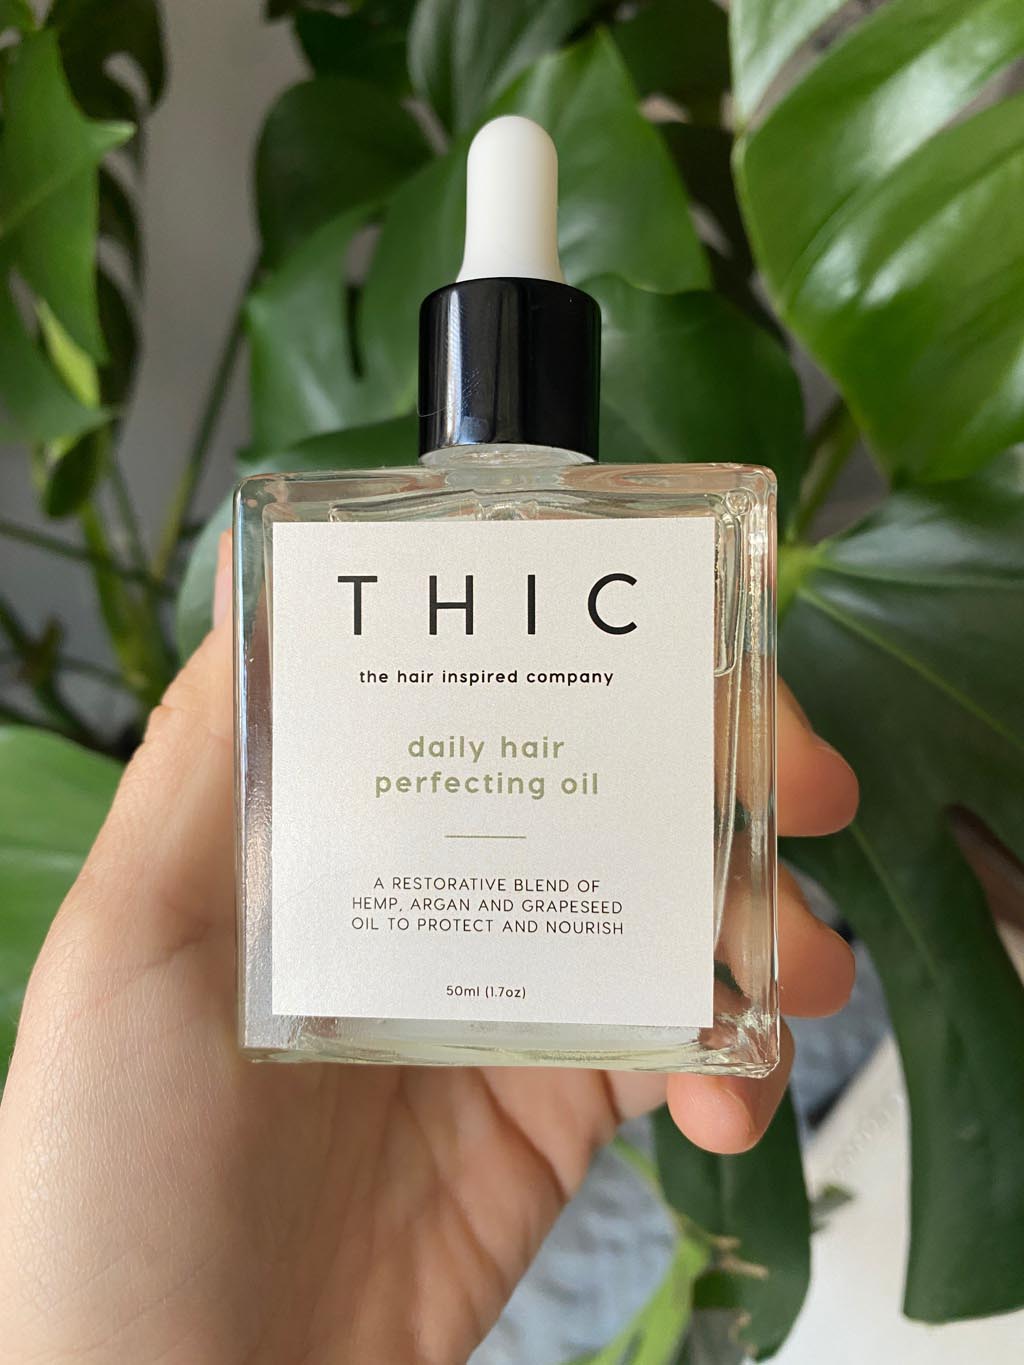
Step 2: Towel dry your hair and apply a hair oil to the ends of your hair to soak right in and nourish those split ends that we all try to avoid having. I like to apply this before using any curl creams or gels. Lately, I’ve been loving THIC Hair Oil! It smells amazing and makes my hair look super shiny!
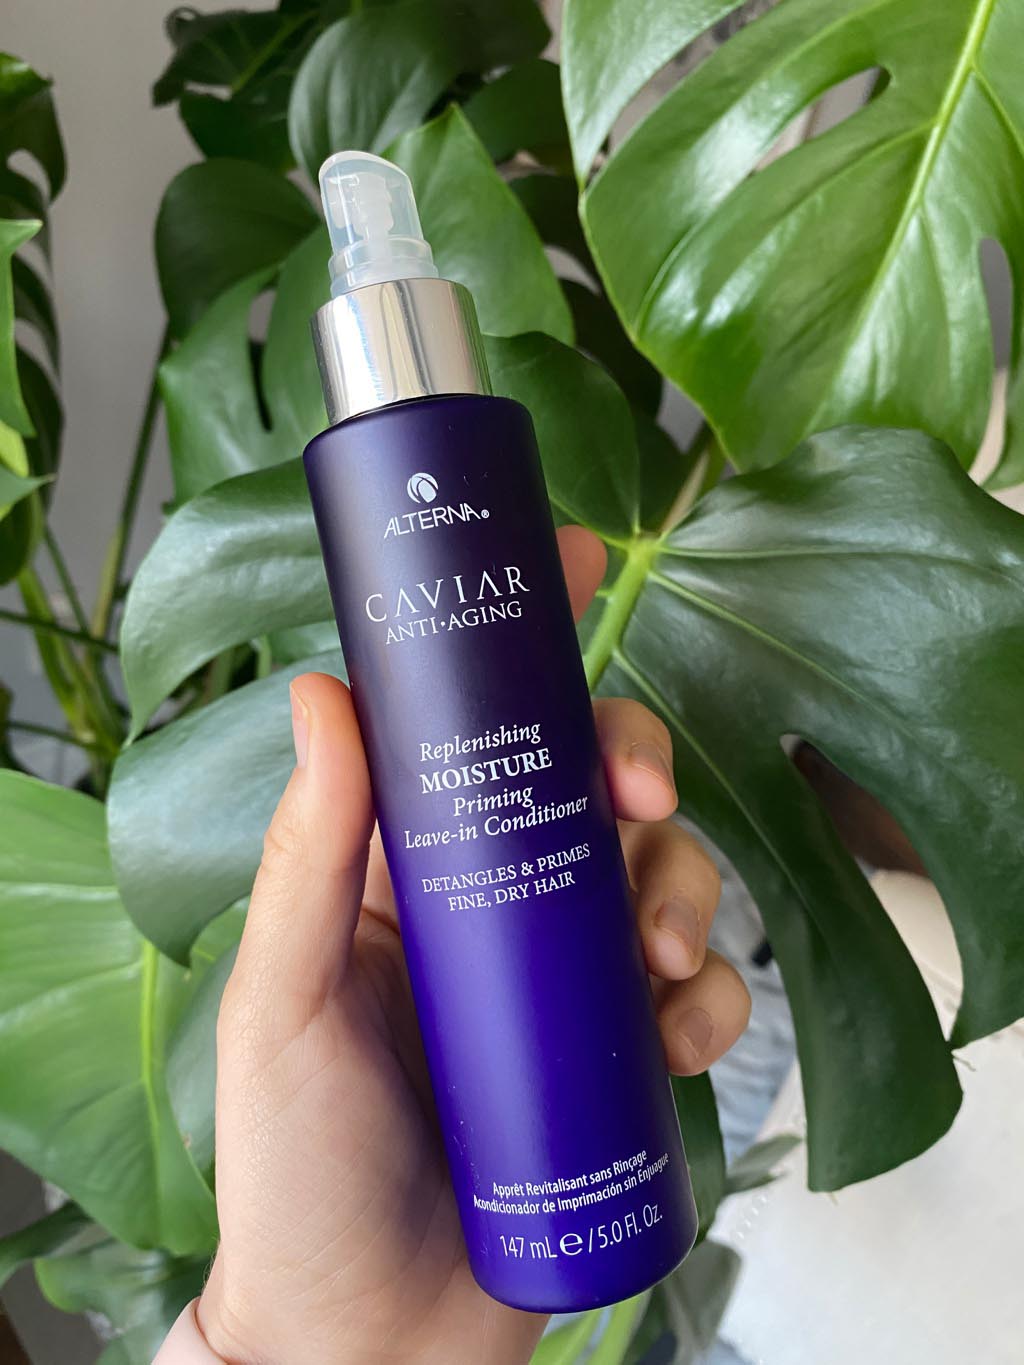
Step 3: Spray in a leave-in conditioner to help make the detangling process a touch easier. I love the Caviar line from Alterna Hair Care for this step: CAVIAR Anti-Aging® Replenishing Moisture Priming Leave-In Conditioner It’s excellent! It’s a lightweight, leave-in conditioner that detangles and primes fine, dry hair.
Step 4: Gently brush out your hair with a wet brush to avoid breakage. One that I am currently loving is Manta Healthy Hair Brush in Pink! So adorbs! I purchased mine from Indigo.ca and here is what they say about the brush: “Ultra-gentle for minimum hair breakage and maximum shine. Manta Healthy Hair Brush is suitable for all hair types including fine, fragile, thick, curls, coils, children, men, and hair extension wearers. Manta was created to glide responsively through your hair using a specialist soft-touch material which means no rough edges to catch or tear the hair shaft. The clever bit? Pioneering patented FLEXGUARD technology on the base enables each bristle to have complete 360 degree motion so it never reaches the stress point that causes breakage. Manta gently frees knots, minimizes breakage, and maximizes shine.” So. Good.
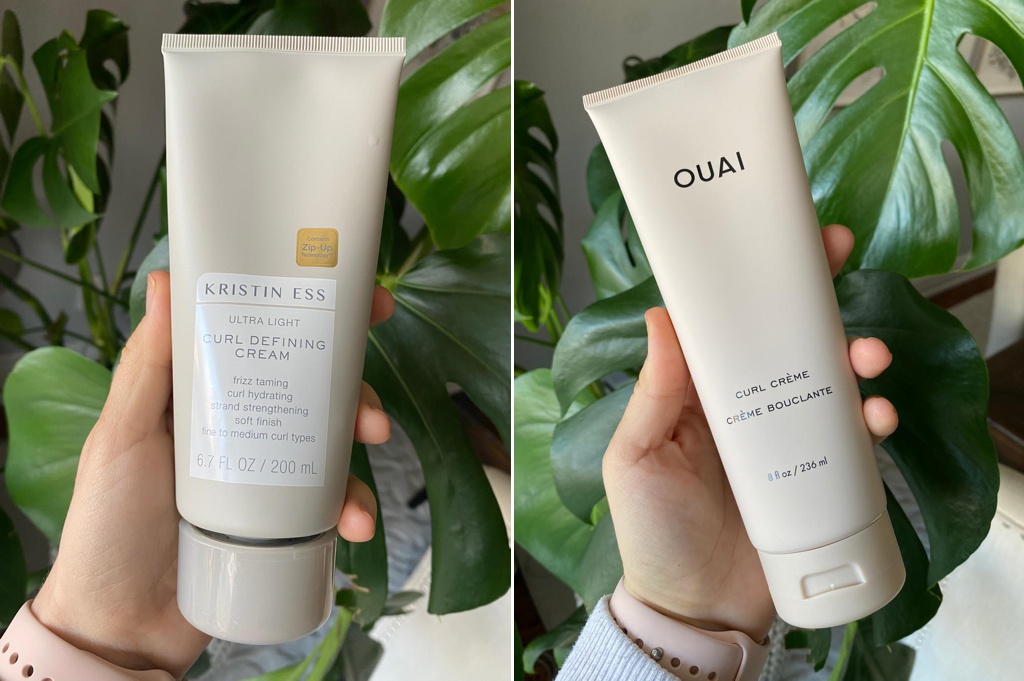
Step 5: Apply a curl cream from roots to ends if you’re looking for that ‘dry curl’ look. I personally don’t love the look of wet or crunchy-looking curls, so I choose creams because they allow my hair to have volume, but also look soft and bouncy at the same time. Two curl creams I just love are Kristen Ess Hair Hydrating Curl Defining Cream and the new Ouai Curl Cream with North Bondi Fragrance. Both are equally excellent! You can’t go wrong!

Step 6: Begin the scrunching process with your hands. From the ends of your hair, slowly start using the palms of your hands to lift the hair up to your roots to start training your hair to wave and curl! Once your hair is 80% dry, whip out your diffuser and use it on low with high heat while continuing to scrunch the hair with your hands. You’ll begin to notice the curls forming and the volume building up. Continue doing this until your hair is fully dry.
Step 7: Use a texturizing and volumizing spray to set the curls and add some extra body! I personally love the Amika Matte Texturizing Spray. It really does the trick! If you find your roots a little flat, use this spray to lift up those areas as well.
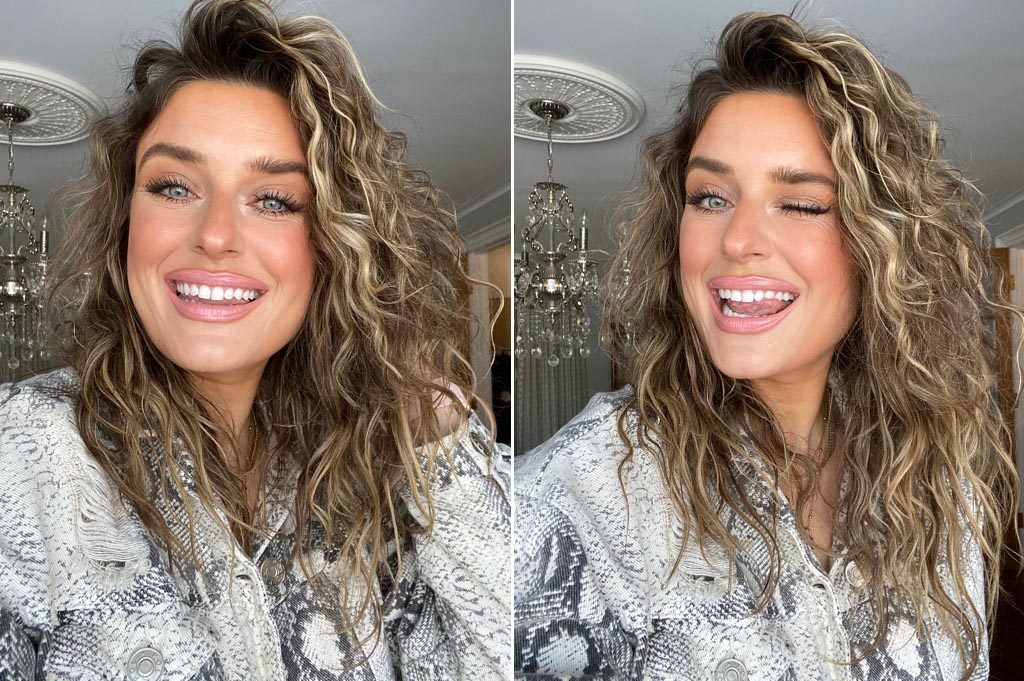
That is my round-up of how I – and you – can embrace your natural curls every once in a while! I really do believe that you can train your hair to be more wavy and curly if you style your hair this way more often! I also love using the technique above to ensure I’m not always styling my hair with hot tools. It’s a very healthy way to wear your hair! Anyway beauties, run and enjoy your hair in its natural state! It certainly feels good and every now and then; less is more!

Kristin Ess Shampoo // @kristin_ess
Kristin Ess Conditioner // @kristin_ess
Kristin Ess Ultra Hydrating Curl Repair Mask // @kristin_ess
Kristin Ess Hair Detangling Comb // @kristin_ess
THIC Hair Oil // @thicproducts
CAVIAR Anti-Aging® Replenishing Moisture Priming Leave-In Conditioner // @alternahaircare
Manta Healthy Hair Brush in Pink // @mantahair
Kristen Ess Hair Hydrating Curl Defining Cream // @kristin_ess